Showing posts with label Baby. Show all posts

Tuesday, August 30, 2011

Something I wish I had when growing up.....Kay's Klips

Cupcake got these great clips and clip holder from a friend.  I love them so much I had to blog about it!
These are the creations of Tina who is the mastermind behind Kay's Klips .  She is a mom who started making hair clips for her daughter.  Then friends and family started noticing her unique and cute creations and encouraged her to start her own small business.  Thanks goodness for us she listened!


This is Cupcake's Klip Holder?  Isn't it nice?  I love how she can use this even when she's older to organize her hair clips. 

Kay's Klips come in different designs.


You can see the great detail that goes into each Klip.


The different ribbons Tina uses to cover each Klip and the cute embellishments coordinate perfectly!
The cupcake embellishment fits my daughter, since I call her Cupcake.


The panda Klip is my personal favorite.  I love pandas.  Wonder if I can wear this???


Tina's designs are unique, and you can't get these types of hair clips in stores.

I recently purchased a Klip holder and some Klips for a coworker's daughter who recently turned 1.  Tina was great and was very informative about which fabric for the Klip holder would match her nursery colors!  I also included the little girl's interests and she created Klips based on that!  She was very professional.  She even included a hand written thank you card!  Who even writes now?!   
   You can also check her out on her Facebook  page and follow her so you see her latest creations.


Thursday, August 25, 2011

Avocado Shake

I know for some of you, avocado shake may sound a little weird.  Believe it or not in Asia and Brazil, this delicious treat is very popular.  Here in California, you can order it in some restaurants...since avocado is very abundant over here.  Growing up, my mom would make us this avocado dessert with
  • 3 medium ripe Avocados
  • 2 scoops of Vanilla Ice Cream
  • 3/4 cup Condensed Milk
  • 3 cups Ice Cubes
  • 1 Cup Milk
  • Sugar to taste (Optional)


Sometimes she would serve it without the vanilla ice cream and just add sugar to sweeten the shake.  Either way...it's very yummy.  Just throw all the ingredients in a blender!


Well growing up drinking avocado shake, I decided to make a baby version for my Prince but in puree form.

  • half rip Avocado
  • 1 tbspn of breastmilk (you can add formula if you want)
  • 1 tbspn of ripe banana or sweet apple (this will add the sweetness to the Avocado)

After you puree the avocado and the banana,  add some breast milk/formula to make the mixture more smoother and thinner.  This can vary depending on how you want it.

So now you and your baby can enjoy this dessert during the summer!  Enjoy!

Monday, August 15, 2011

Halloween in August!

Okay...I'm one of those moms who get super excited about certain holidays...especially Halloween. I've been thinking about costumes for my baby boy...and yes I know it's August.  I've checked some sites already and I'm not the only one thinking way ahead for Halloween.  Check out these cute adorable costumes from Carter's.

For my son who was born year of the Tiger!


cute dragon

adorable dog

check out this chickee and the leggings!

This baby looks purr-fect in her kitty costume

Proud Firefighter

Smiling Lady Bug


Even Pottery Barn Kids is also posting their Halloween collection for this year.

Shark Attack!

Good witch or bad witch?

What a sweet pea!

Huggable Bear!

Fairy Princess!

Whoo whoo...owl!

Thursday, August 11, 2011

Apricot Puree

Although I've only made apple puree and baby avocado shake for my son, I find making baby food fun.  Sure I don't have time to cook meals for my husband and myself, but for some reason finding time to make baby food always happens.  This week I tried making apricot puree.  I recently got a box of apricots from a friend of mine who has an apricot tree in her front yard.  Mama B and I decided to split the box and make baby food with it.  Since my son just started solids, he is still in Stage 1 so I just made apricot puree.  It's pretty straight forward and all you need are
  • Apricots


  • Steamer (I use my rice cooker)

  • Food Processor (I use my Cuisinart hand held blender)
I simply cut the apricots in halves, take out the pit, and place them in my steamer basket
I love the gorgeous orange color.
I steam the apricots for about 15-20 minutes.  It really depends on your steamer and how hot it gets. Once the apricots are soft and tender they are ready.  Let them cool and begin to peel the skin off. After you peeled the skin off, the apricots are ready for puree!

Tender Apricots, cooling for peeling
Peeled Apricots
Ready to be Puree

Chopping the peeled apricots

 Ready!!
Yummy! Perfectly sweet.
A quick taste test and it's ready!  Perfectly smooth and sweet for my Prince.  Any extra Apricot Puree I have I store using the Munchkin Fresh Food storage cups and immediatly put them in the freezer!

Tuesday, August 2, 2011

Knock Knock....

My daughter loves IQ Baby Knock Knock blocks.  I have to give these blocks credit for helping her learn how to crawl.  We would put her at one end of her crawling mat and make a tower of blocks on the other side of the mat.  She would try all her might to go towards the tower of blocks to knock it over.  At first she accomplished this by rolling, then it turned to military elbow style, and finally crawling!

      
These blocks are very colorful and each side is made from different fabric.  This is great because your baby will be able to see different colors and feel different textures.  Each block also makes a different noise and also has either  a window or a door which one can open to entertain your baby.
 
                                        
I love these blocks because they are soft.  My daughter loves to grab things and throw them down...usually at me!  One time she took my iphone and threw it at my face!  I was kind of worried I would have to explain to my coworkers how I got a black eye....luckily it never bruised.  I am a bit of a neat freak, so the fact these blocks come in a zipped up bag is a plus for me.


Thursday, July 28, 2011

My 1st Puree

I'm starting solids with my little guy.  He's been eating rice cereal 3-4 weeks now, so I think it's time for some puree food.  I've been going back and forth to which one to expose him to...it will be the first puree food he is going to eat...so  I want to make sure he enjoys it.  Of course as a new mother you ask around, so that's what I did.  I was curious what other mother's chose as their baby's first puree food.  I even asked Mama B for some advice.  So which one did I choose...was it apple, banana, or avocado...hmmmmm. 

I ended up giving my son Red Delicious apples as his first Puree.

3 washed Red Delicious Apples
Here's the recipe, it's fairly simple and straight forward:

Placed quartered Red Delicious apples in a steamer.  I use my rice cooker to steam the apples

Quartered apples placed in the steamer basket

Once apples are tender, I let the apples cool. 

Tender Apples cooling


After the apples have cooled I remove the skin and puree it using my Cuisinart hand blender.

Puree Apple

I do a quick taste...delicious!  and it's now ready to serve.  Like Mama B, I place my purees in Munchkin's Fresh Food Freezer cups for storage.  Prior to serving, I usually mix in a little bit of breast milk.
Puree Apple in Munchkin's Fresh Food Freezer cups ready for storage.

Monday, July 18, 2011

Bath Time is now Play time!

Bath time for my son used to be a nightmare.  He would start screaming once his little toe hit the warm soapy water.   When I say screaming, I mean like he was in severe pain going to die screaming.  Sometimes he would open his mouth real big and no sound would come out.  Both my husband and I would bathe him in various ways trying to play with him while he was in his mini bath tub.  Because he would scream and fidget in his bath tub, bath time became a dreaded chore for us… but we both knew we had to do it.  In fact after each bath…we were sooo tired out, exhausted from trying to keep him in the water, playing with him, and  making it fun.  This went on for the first 3 months! I remember initially I would constantly check the temperature of the water, scratching my head why he was screaming all the time.  I even bought bath toys to keep him preoccupied while he was bathing…but he was still screaming.

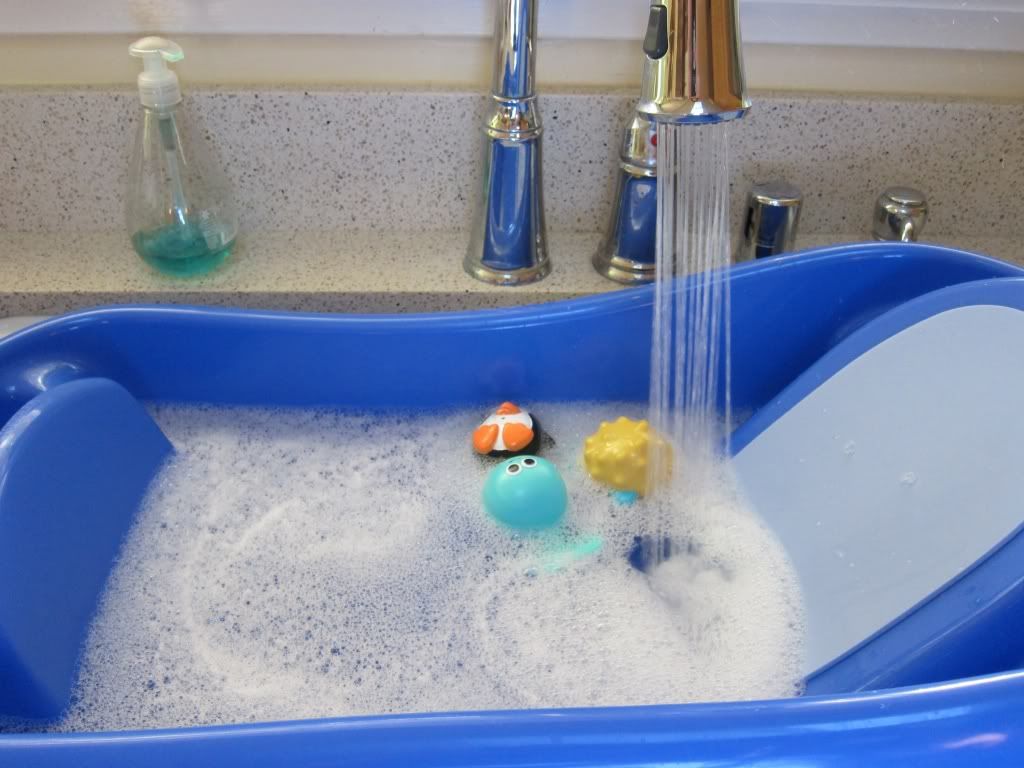
When I came back to work, I started talking to a friend of mine who has two kids of her own.  She has a lot of experience under her belt so I asked her for some advice.  She told me she also had the same problem and ended up placing the mini bath tub in her kitchen sink and using those dish sprayers while bathing her kids when they were babies.  The spray of water helped keep her babies preoccupied and made the bath a fun experience. 

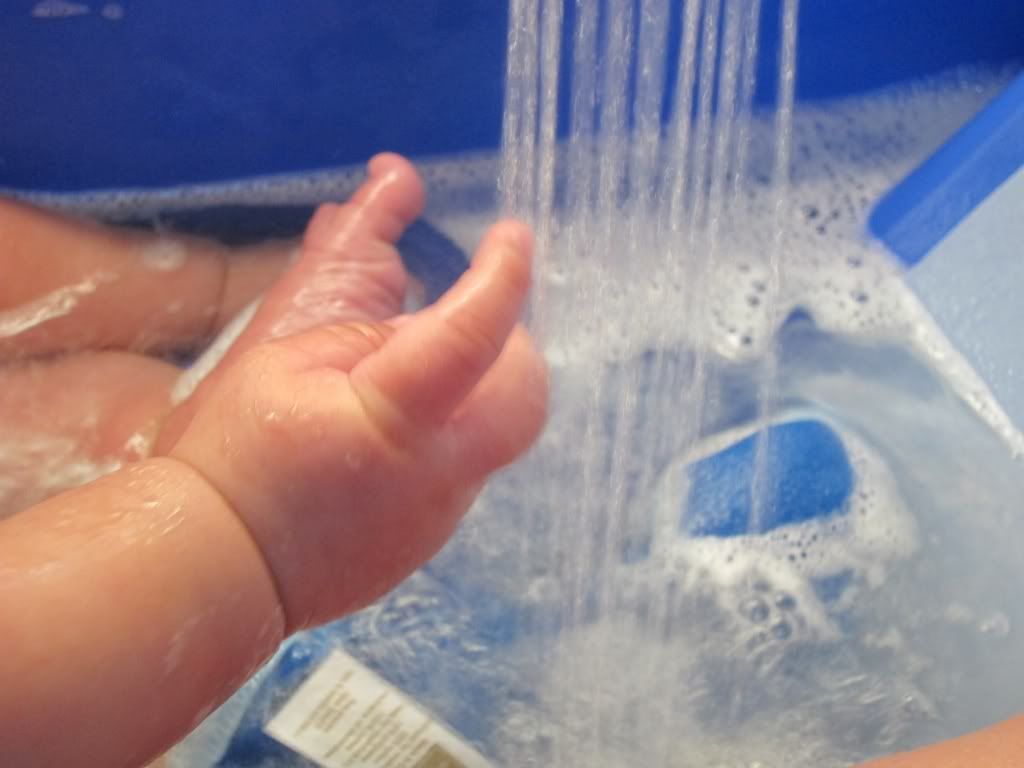
I decided to try her advice.  I set up a bath station in my kitchen sink.  Placed his mini bath tub in the sink, filled it with water, and started running warm water through the sprayer.  Once everything was perfectly set up, I carried my son to the bathing station and placed him in his mini bath tub.  I can see his eyes were getting drawn to the sprayer… and he slowly reached his hands trying to feel the water coming out of it.  To my surprise…my son did not scream the whole time he was getting a bath.  Sure he was fidgeting while I was giving him a bath, but at least he was not screaming.  What a joy it was to my ears to hear just water splashing during bath time.  After a few times, my son finally stopped fidgeting and now enjoys taking baths!  He loves splashing in the water and playing with his squirting toys.  Bath time is now  playtime in my household.   Both my hubby and I no longer dread bath time with our baby.  In fact, I can give my son a bath by myself!  No need for hubby to help me keep him down. I now look forward to his baths…spending time with him and seeing him laugh and smile. What wonders a simple sprayer can do to bath time! 

Thursday, July 14, 2011

An Apple a Day Keeps the Doctor Away

My sister today told me her coworker asked if we have baby food recipes.  I told her we can start adding some to the blog, so here are 2 recipes  I made on Monday for my Cupcake using apples.

Making baby food is simple.  All you need are:
1.) steamer
2.) mixer
3.) containers to hold the baby food.
4.) peeler
5.) knife
6.) spoon

For items 1 to 3, I use the followiing:
  •  rice cooker w/ a steam rack.  (I use a rice cooker because I cook in batches)
  • Cuisinart
  • Munchkin baby food containers
The hardest part is probably prepping and cleaning. 

Recipe One:  Peas, Corn, and Gala Apples 
  • 1/2 cup of frozen organic peas
  • 1/2 cup of frozen organic corn
  • 2  Gala Apples (sliced in cubes)
  • 1/4 cup of baby water (This is just to make it less clumpy, so add to your liking)
(This makes 2 servings for my daughter who eats 4 oz. each meal and is now 11 months old)

I place all ingredients on the steam tray of the rice cooker.  Cook until fork can easily go through the apple slices ~ 15 min (w/ my rice cooker).

Puree peas, corn, and apples

Recipe 2:  Butter squash, roman tomatoes, and Pink Lady Apple
  • 2 roman tomatoes
  • 1/4 butter squash
  • 1 Pink Lady apple (These aren't sweet as the Gala apples.  They are a bit sour)

This makes 2 servings as well...so 8 oz total.

My Cuisinart (gift from my mom just to make baby food), Munchkin baby food containers, peeler, knife, spoon,  and ingredients.

Place ingredients in steam tray of rice cooker.   Cook until squash and apples are soft.  Tomato skin will come off so it's easy to remove afterwards.


Finished product!

Afterwards, I immediately place the food containers in the freezer to preserve the nutrients.  Never microwave baby food before serving, since food is often heated unevenly. 

Tuesday, July 12, 2011

Itzy Ritzy

I recently got my Snack Happened and Wet Happened bags from Itzy Ritzy that I bought through OpenSky from Project Nursery! I absolutely LOVE them!  I bought the Urban Jungle Blue for my son and Licorice Swirl for myself.  The Snack Happened bags are not only reusable and washable, but they are also FDA approved & BPA Free!  The fabric is made from 100% cotton and is lined with thick and lush PVC-Free waterproof lining.  The Snack bags are 7" x 7" and are machine washable.  They can be used to carry snacks, fruit, sandwiches, cell phone cords, lotions, toiletries...the list goes on and on.  Kids and adults can use them!

Use them to carry snacks. 
Use them to carry baby stuff
Use them to carry lotions or sunglasses
The Wet Happened bags are bigger than the snack bags which allow you to carry diapers, swimwear, clothes, and the list goes on.  These bags will not wick even with the wettest items and are machine washable!  The Wet Happened bags come in two sizes:
  • Medium 11” x 14” holds 4-6 cloth diapers
  • Large 14” x 17” holds 6-8 cloth diapers
I got the 11" x 14" Wet bags, again in Urban Jungle Blue and Licorice Swirl.  I love the Urban Jungle Blue print, so cute and adorable!  I placed a few of my son's gear in the bag and took some pictures of the wet bag!  There's still plenty of room for more stuff!

Wet Bag filled with my son's "stuff"

one onesies, 3 diapers, a burp cloth, and cotton wipe

Son's stuff as it goes in the Wet bag

Son's stuff in the Wet bag...and room for more!

These bags come in a variety of wonderful designs your little one will love!  They recently came out with new designs such as Funky Monkey Remix and Peace Love!   Be sure to check out Itzy Ritzy!