It's Pop Art!
I wanted to give my son's room a modern and vibrant art piece above his crib so I tried this DIY Pop Art I found on the Family Fun website. I did my Pop Art on a portrait of my 4 month old son wearing his shades and hat. It gave out a smooth cool vibe which I thought went well with the Pop Art look.
To do this DIY Pop Art you will need the following:
Photograph
Colored paper
Scissors
Glue
Card stock or matte board
Double sided tape
1. You will need to printout four black and white copies of a photograph of your child's face on colored paper. You might have to play around with the contrast if it isn't strong enough. I decided to make copies on lime green, hot pink, yellow, and orange paper. I then cut the images out as shown below.
2. Then glue them to pieces of contrasting colored paper as shown.
3. Finally, mount the photos on card stock or matte board with double-sided tape, and it's ready to be framed!
Showing posts with label Walls. Show all posts
Monday, June 6, 2011
DIY: Poppin Art!
Sunday, May 8, 2011
Get Inspired!
As I was browsing through the web for some art work for my son's nursery, I came across a website which sells Inspirational Art Work. I thought it was a pretty cool idea to add art work in a child's room that can inspire them as well. These are all done on canvas and are sent out in a wooden frame. Below are some of my favorites:
Saturday, April 30, 2011
Say Bye Bye to Plain Walls
Like all expecting mothers, when I found out we were expecting I became very excited about decorating the new baby's room. I was on pins and needles trying to patiently find out whether our baby would be a boy or girl. When I found out I was having a boy, I knew I did not want the typical blue room.
Instead, I wanted to use colors that were neutral. After much thought I decided to go for brown and green. I knew I wanted to cover the bare walls with a splash of color but painting was out of the question for me. I didn't want to start a project like that knowing I have to finish it, so I decided to look into wall decals.
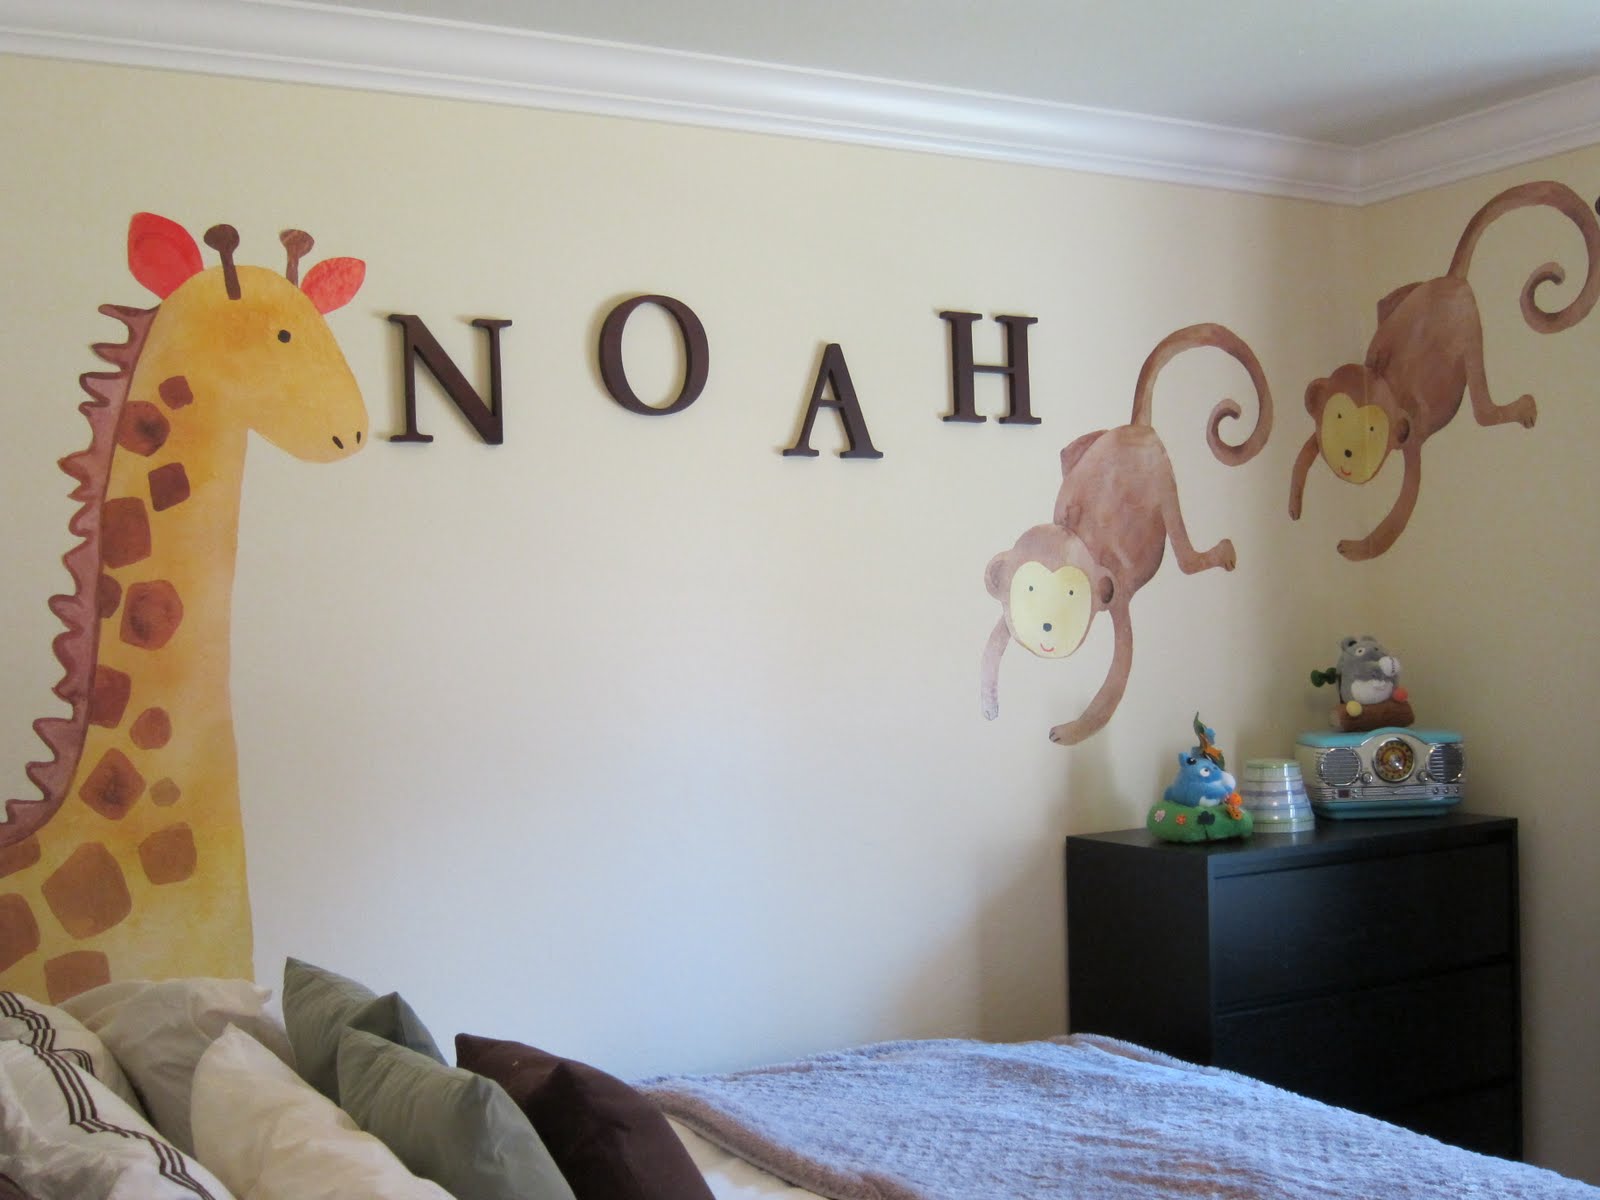
I went into Pottery Barn Kids (PB Kids) and found some wall decals I fell in love with. They had a yellow & brown giraffe and two brown monkeys which I thought would go well in the room. I was at first intimidated by the size of the decals wondering if I can position them correctly on the wall and hoping I would be able to stick them correctly the first time around. When it came to putting the decals on, it was a lot easier than I thought. I was able to peel the decals off, arrange them on the wall to my liking, and stick it back on the wall with no problem. It only took me 15 minutes. After putting them up, the wall was complete, and it no longer looked bare. I actually had people who saw them and thought they were hand painted which was great since this was the look I was totally going for.
My sister also used decals from PB Kids to decorate her daughter's nursery. She chose a more intricate pattern of branches, leaves and birds. It took her more than just 15 minutes since there were more sections to her decals as well as trying to balance each side perfectly. She ended up taking 1 1/2 - 2 hrs putting the decals up due to the pattern she chose. In the end, the wall gave a beautiful feel to the room. She was satisfied with how the wall decal transformed her daughter's nursery.
Overall, the PB Kids decals were fun to use and gave a great feel to the room. If you want to fill in some bare walls consider using these PB Kids decals.
Instead, I wanted to use colors that were neutral. After much thought I decided to go for brown and green. I knew I wanted to cover the bare walls with a splash of color but painting was out of the question for me. I didn't want to start a project like that knowing I have to finish it, so I decided to look into wall decals.
I went into Pottery Barn Kids (PB Kids) and found some wall decals I fell in love with. They had a yellow & brown giraffe and two brown monkeys which I thought would go well in the room. I was at first intimidated by the size of the decals wondering if I can position them correctly on the wall and hoping I would be able to stick them correctly the first time around. When it came to putting the decals on, it was a lot easier than I thought. I was able to peel the decals off, arrange them on the wall to my liking, and stick it back on the wall with no problem. It only took me 15 minutes. After putting them up, the wall was complete, and it no longer looked bare. I actually had people who saw them and thought they were hand painted which was great since this was the look I was totally going for.
| Giraffe and monkeys decals |
| "Hayley" decal |
Overall, the PB Kids decals were fun to use and gave a great feel to the room. If you want to fill in some bare walls consider using these PB Kids decals.
Subscribe to:
Posts (Atom)